A replacement auto-return lever for a Micro-Seiki MB-14 Turntable. A commonly problematic part, owing to the small tab that interfaces with the cam for the auto-return mechanism.
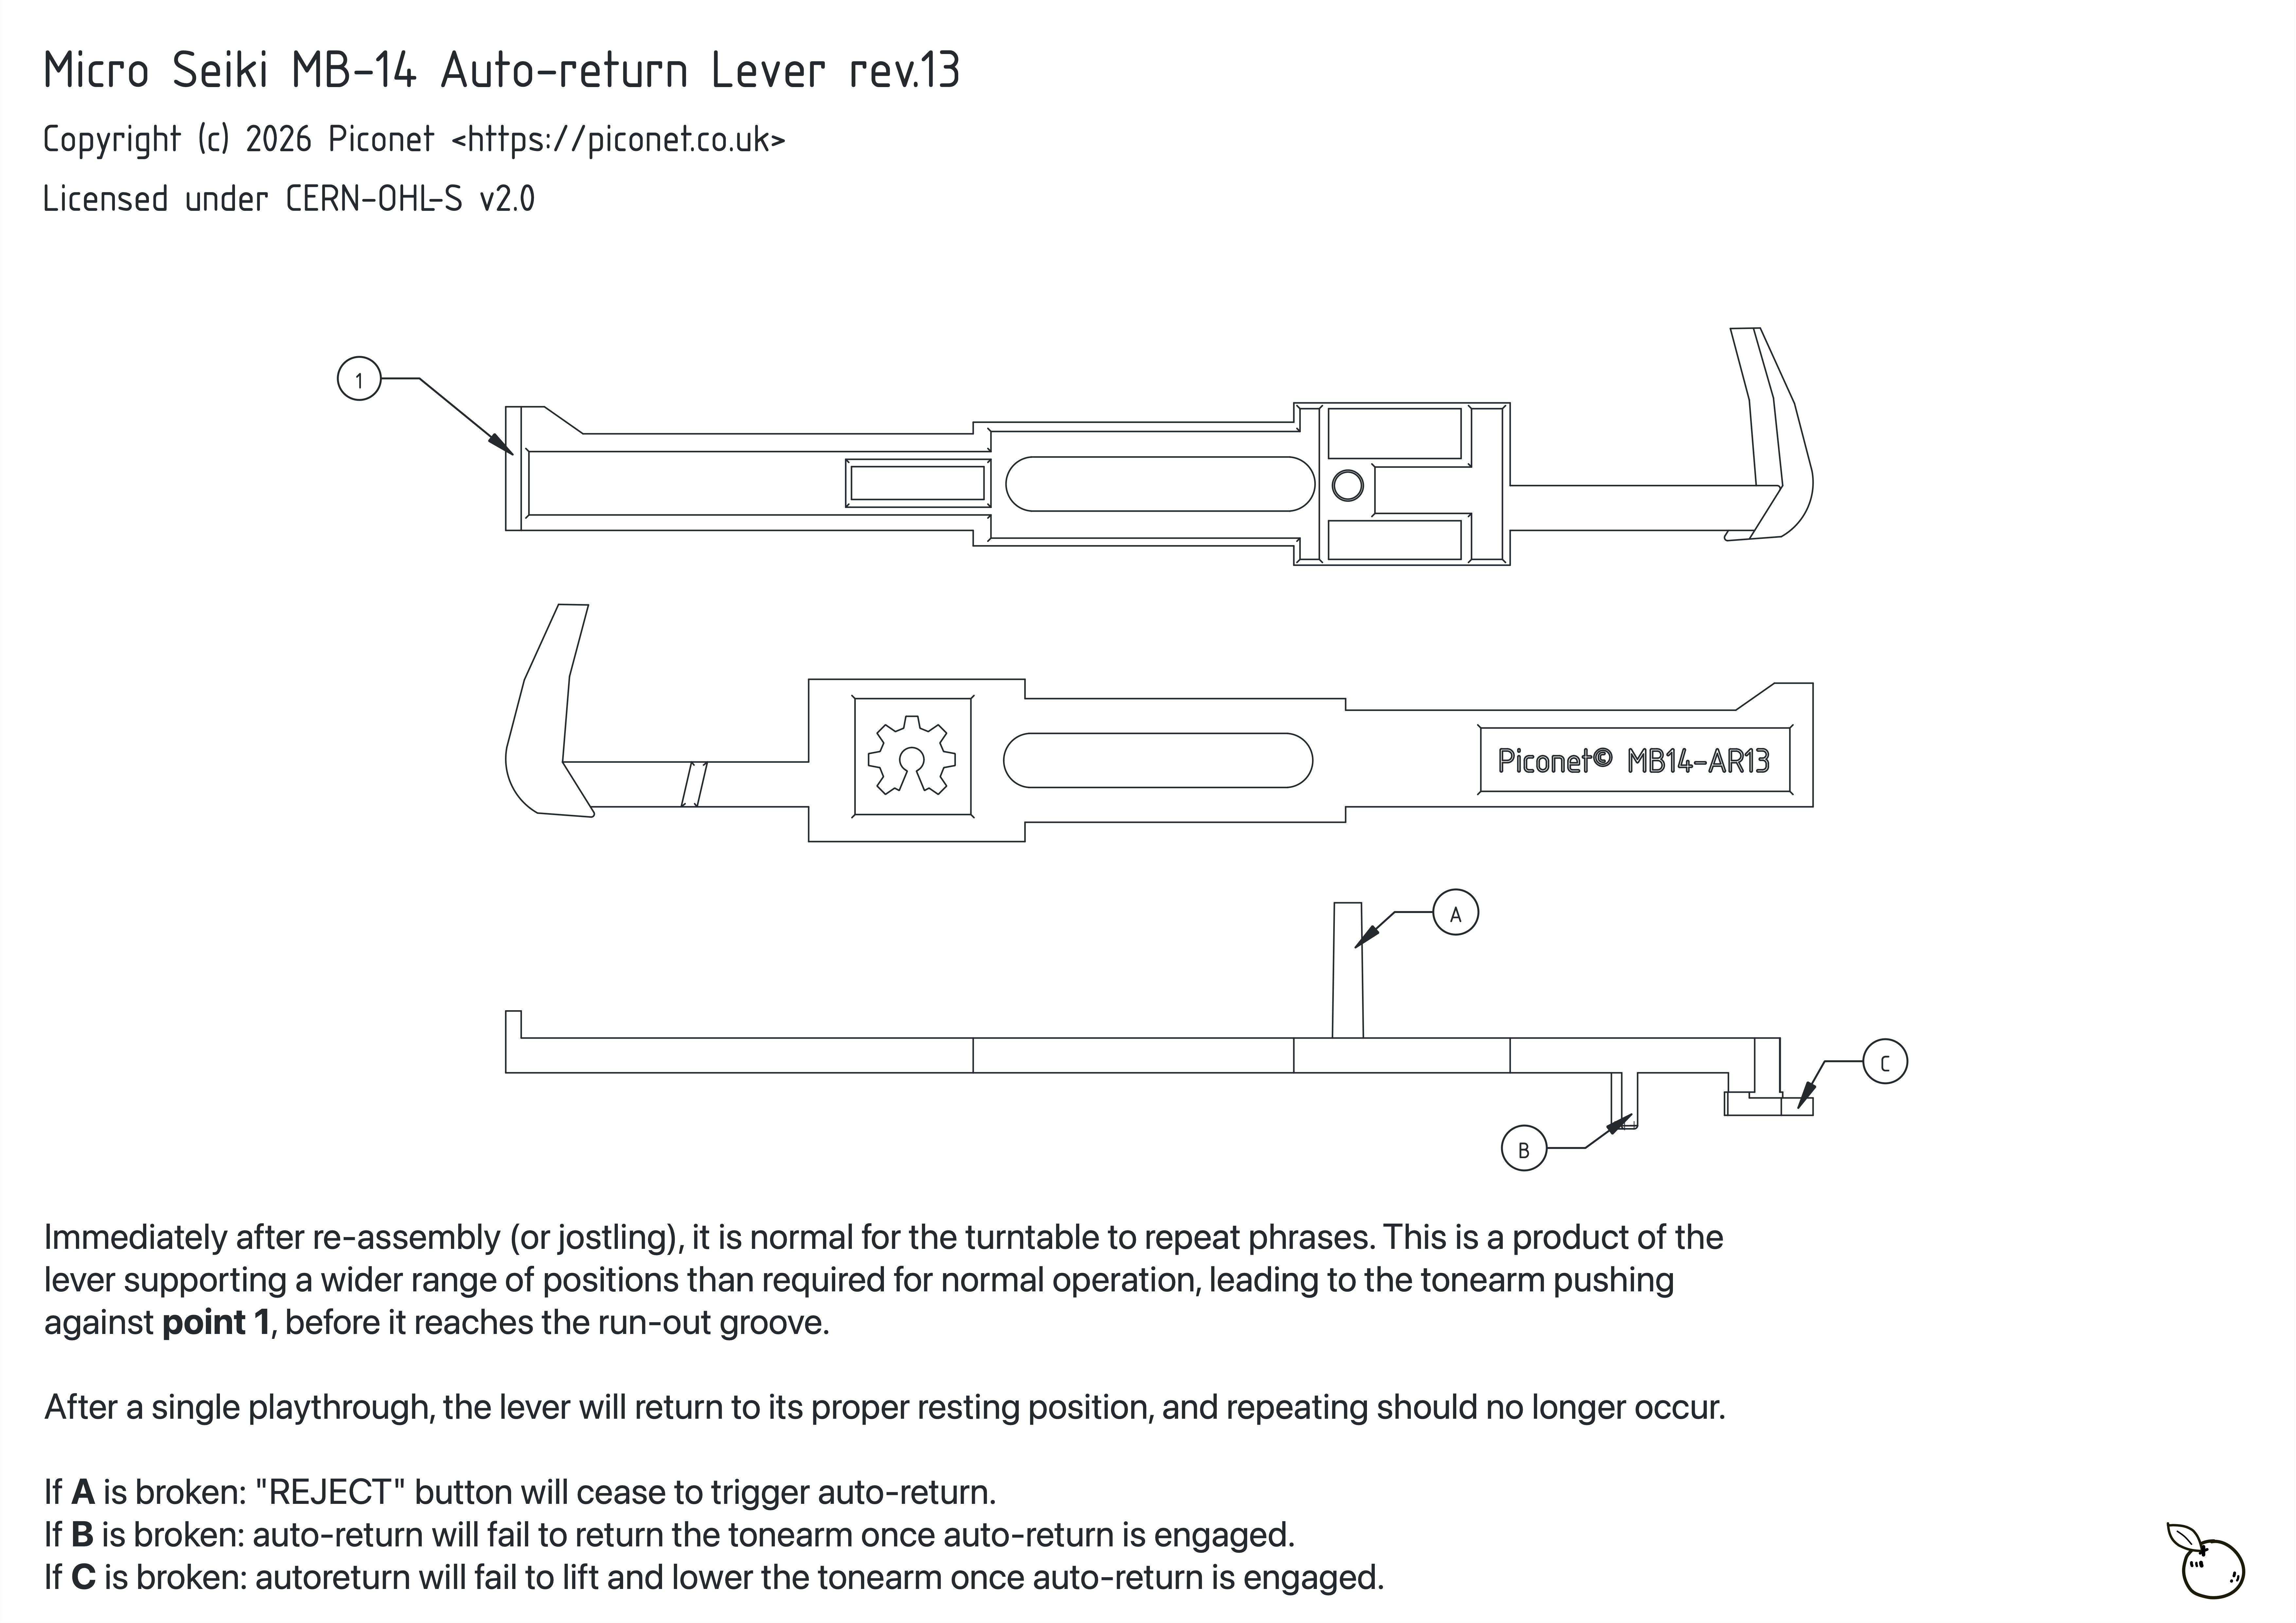
Depending on which part of the auto-return lever is broken, the MB-14 will malfunction in a variety of ways. Refer to the technical drawing below for an overview of these failure states.
This part is designed for printing on an SLA resin printer. Printing on a typical FDM printer is also possible. Minimal force is applied to the part under normal operation, thus most materials are perfectly suitable.
Print-on-demand costs £5.99 for two parts (one replacement, one spare, in ABS-like resin) with inclusive postage (Royal Mail) to anywhere in the UK. Print-on-demand parts are made from ELEGOO Water-washable ABS-like Resin and are printed on a ELEGOO Saturn 4.
Do note, post-sales support for installation is not provided. See Installation below for an overview of the process.
This model is available on Cults3D for free!
Technical Drawing
Renders
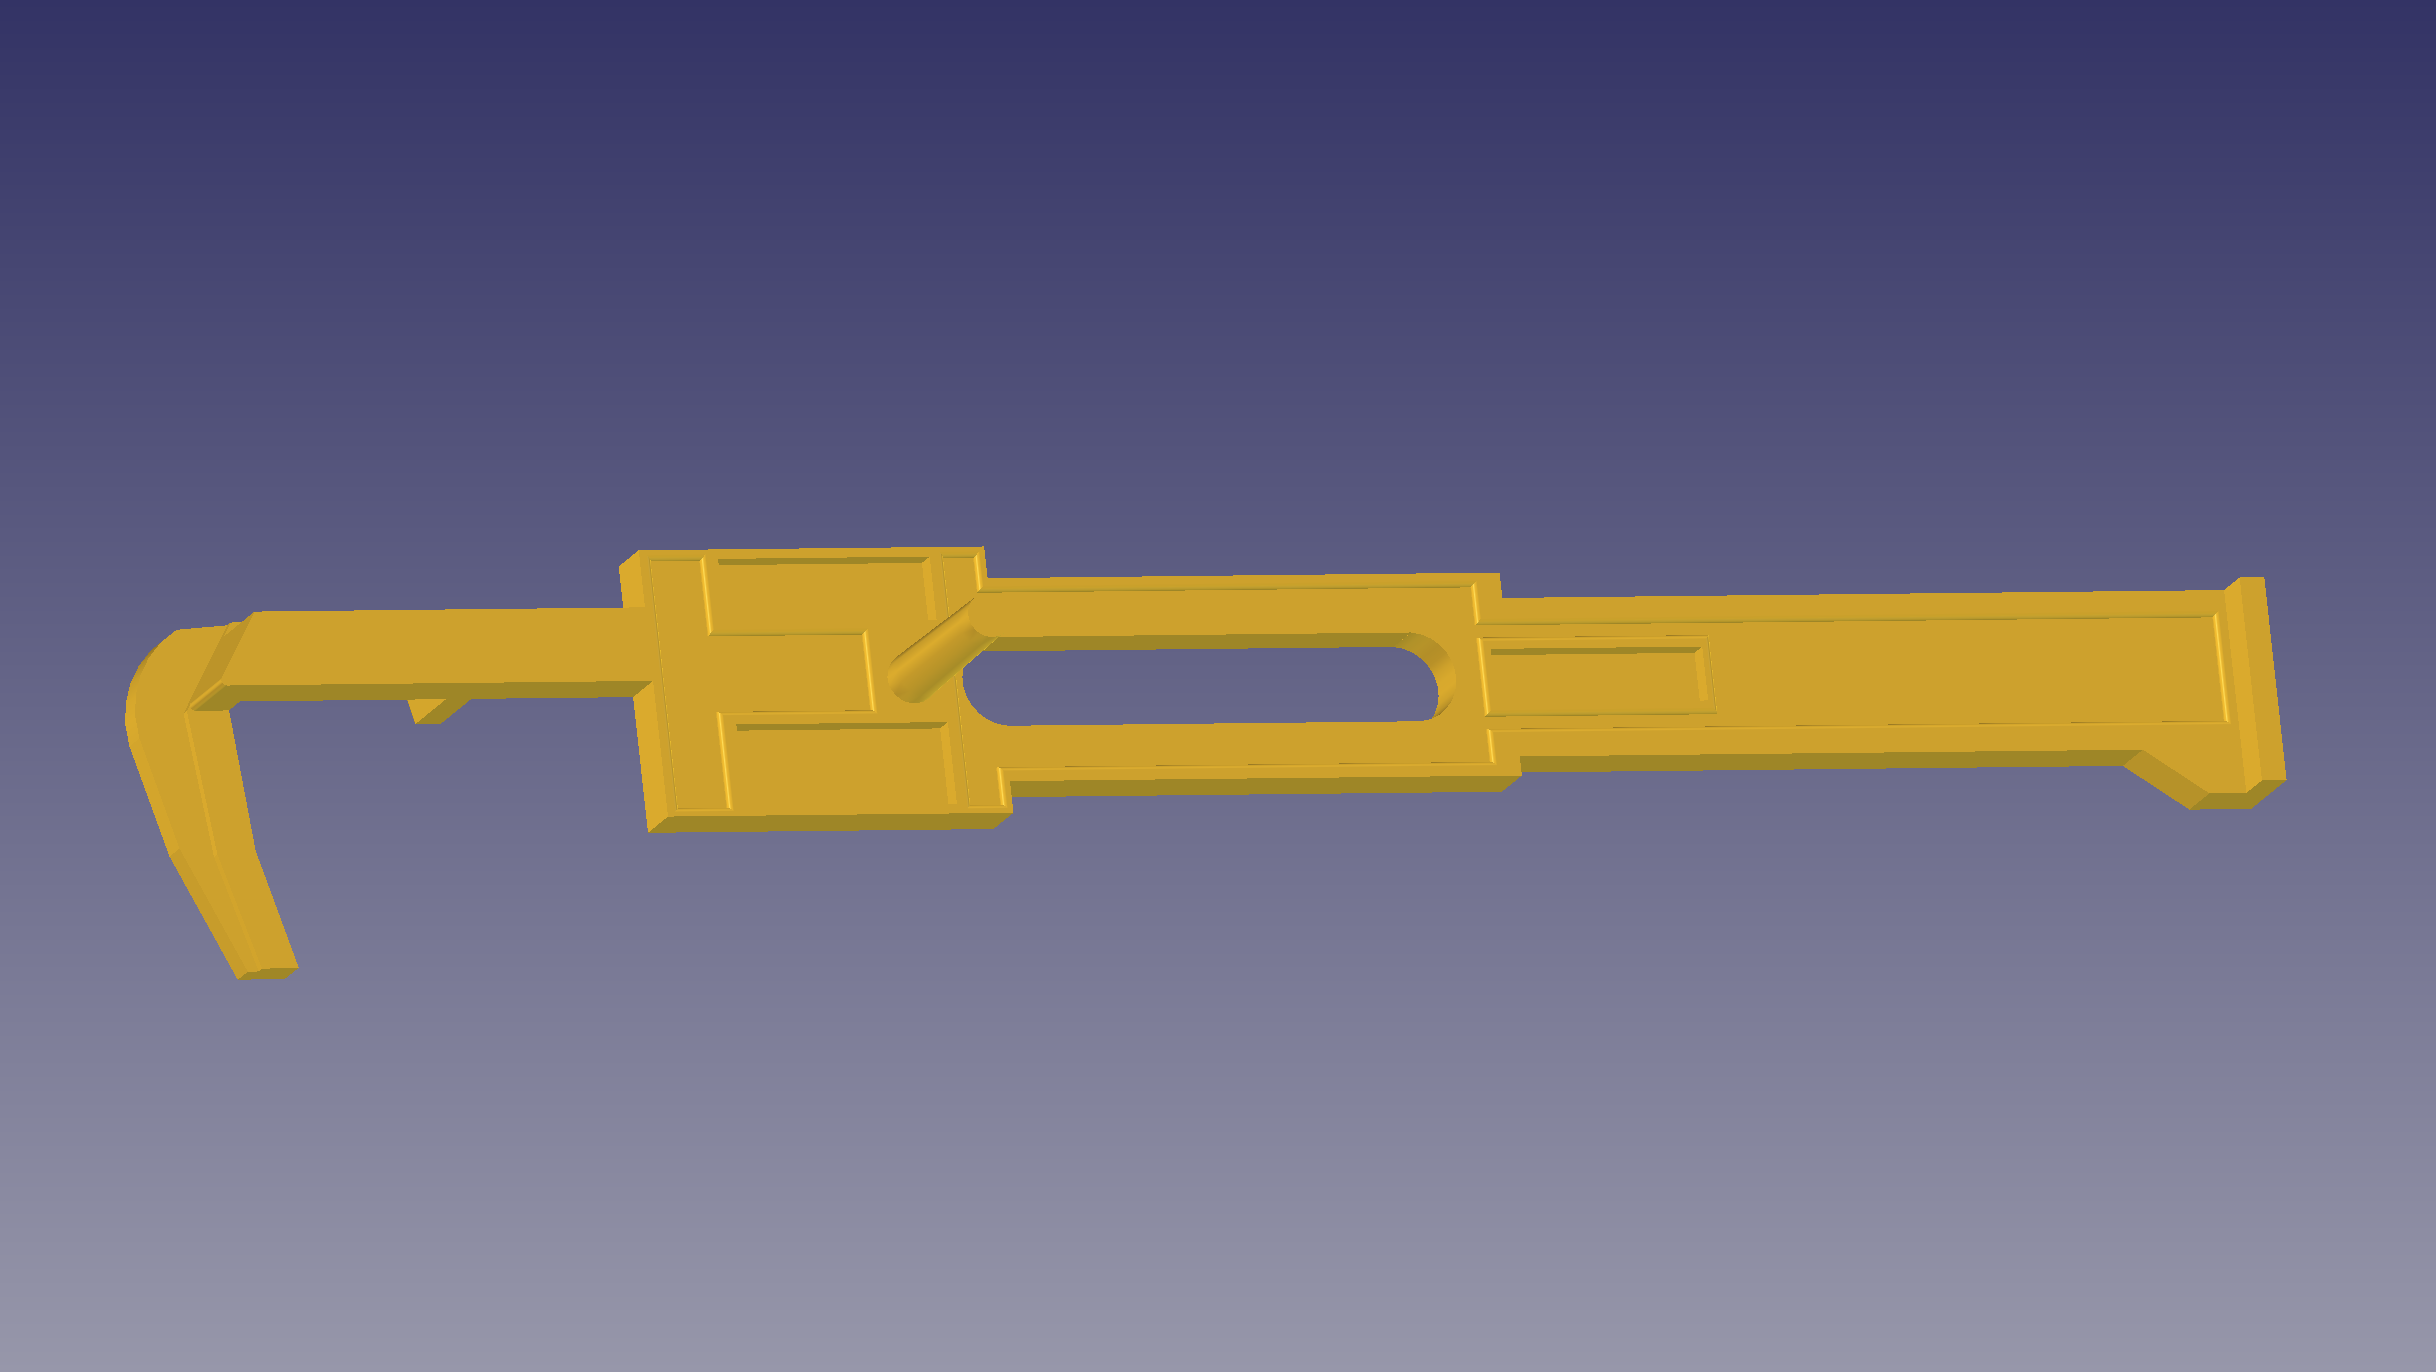
Overside
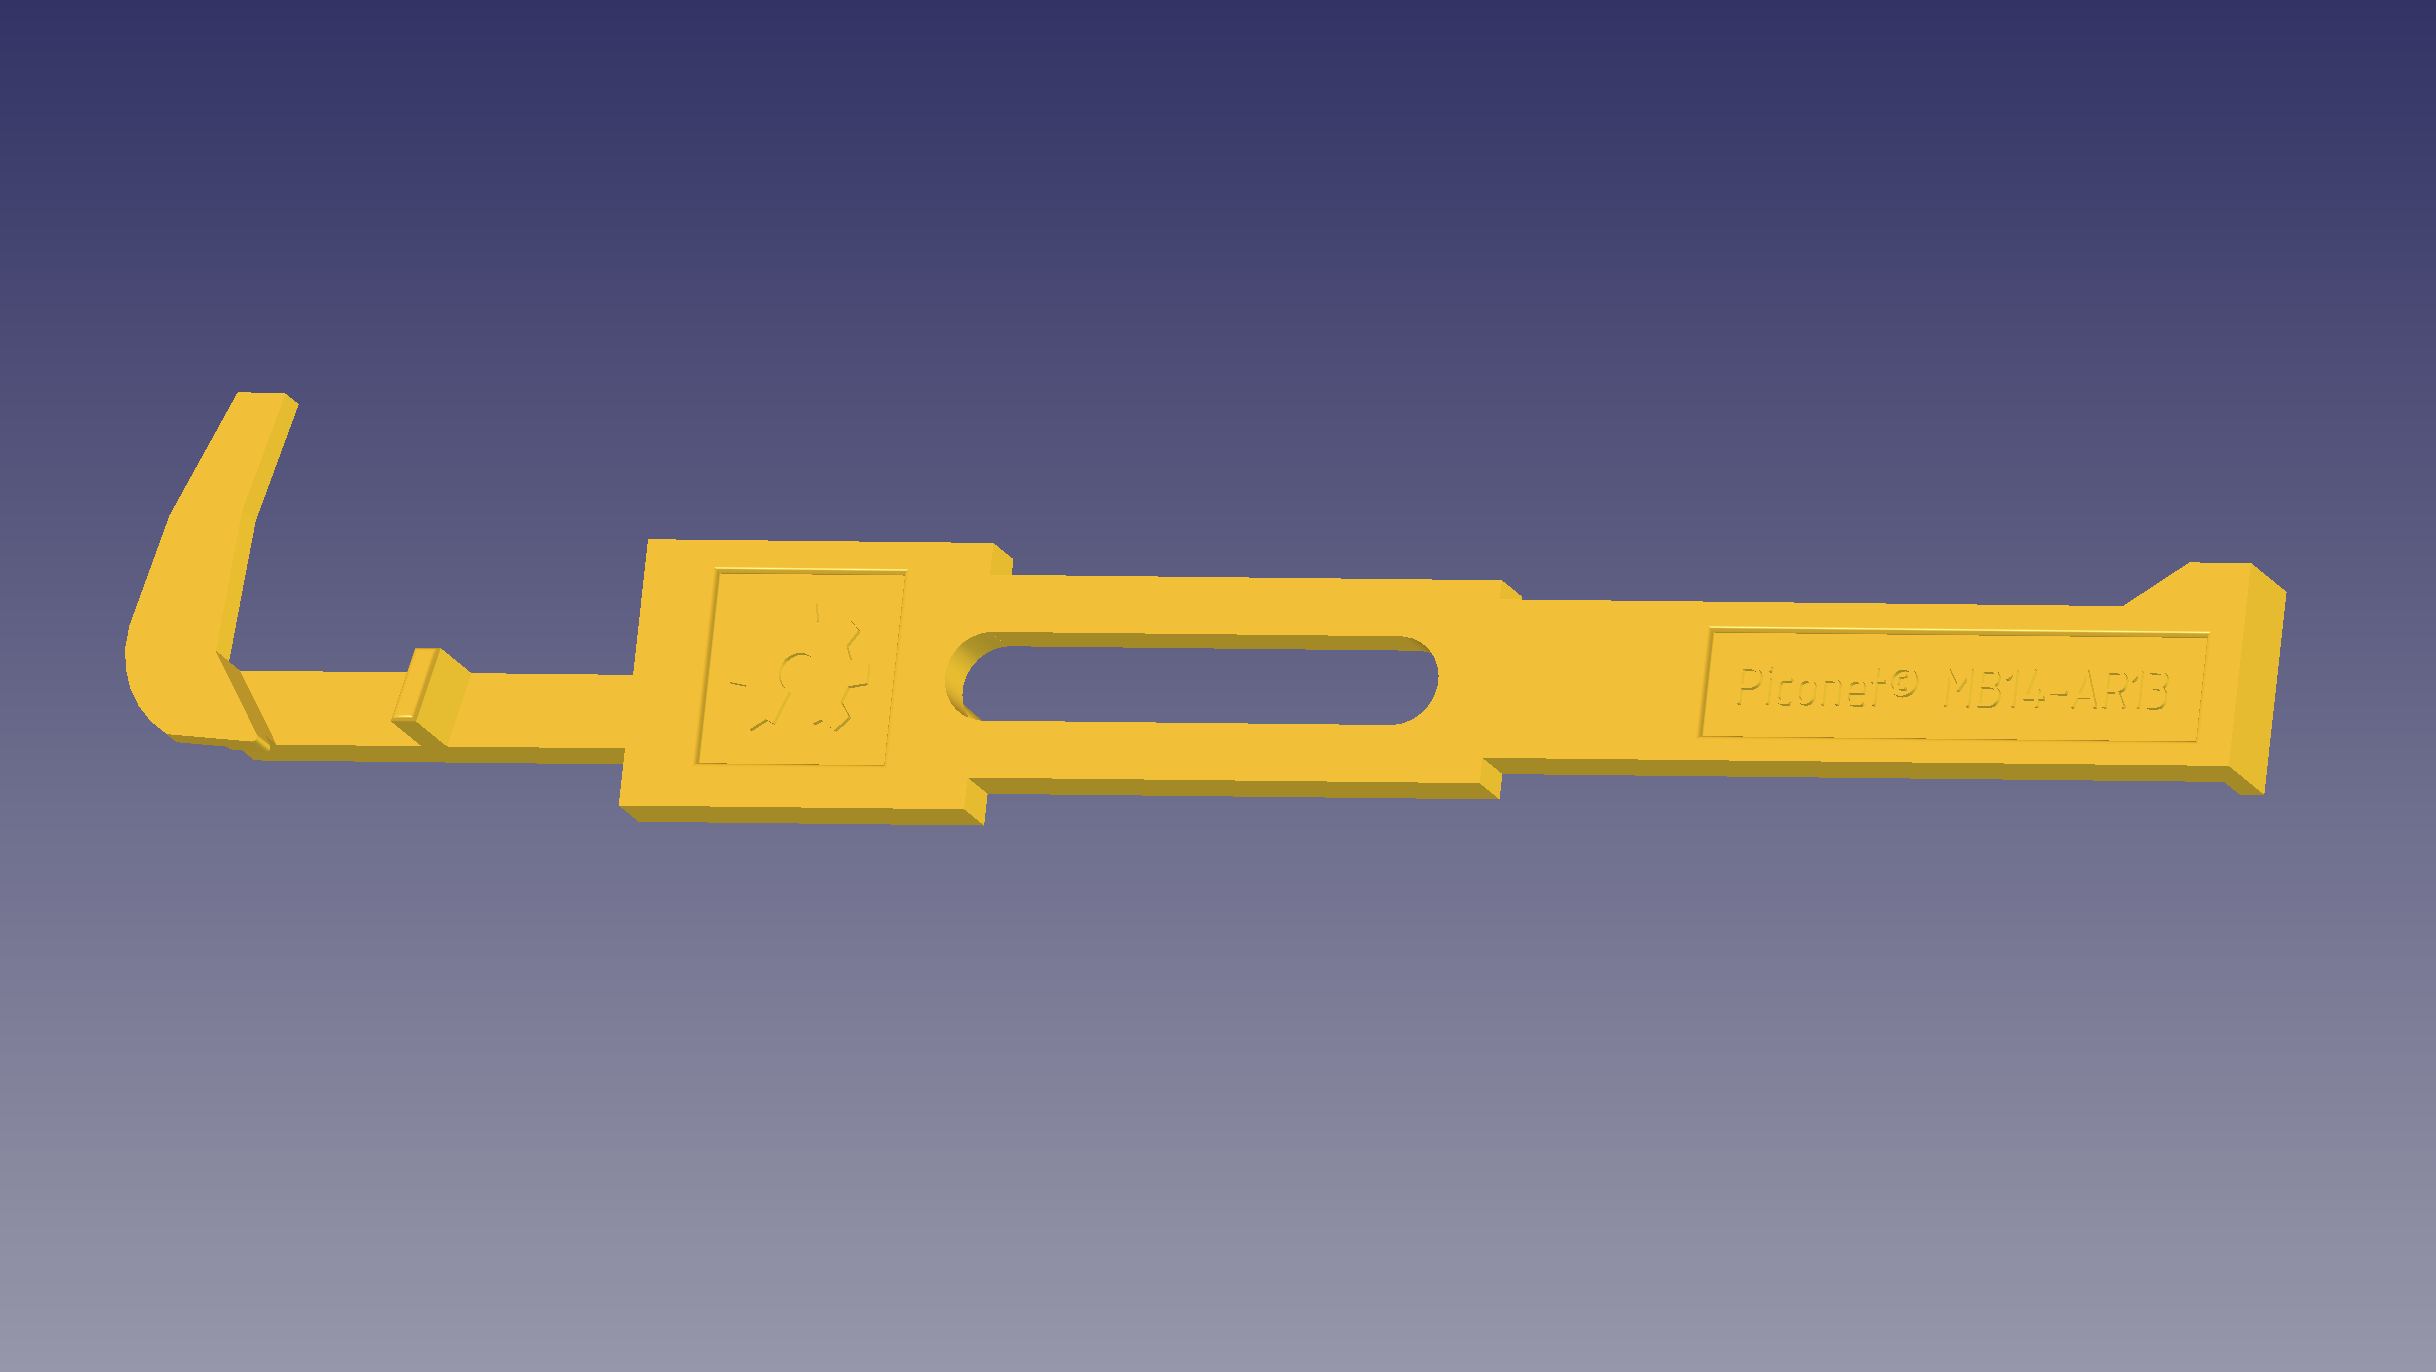
Underside
Printing Instructions
If SLA (resin) printing:
- ABS-like resin is recommended, but not required.
- Water-washable resin is fine.
- Eco resin is fine.
- Orient the part such that the bearing slots face away from the build-plate. This will avoid the slots action as suction cups, and avoid the need to place supports within them.
Refer to your resin manufacturers' instructions in regards to layer timings and curing instructions.
If FDM (conventional filament) printing:
- PLA, PET-G, ABS, and ASA are fine. ABS/PET-G are likely best.
- It is recommended to remove the text and OSH logo in FreeCAD before printing.
- Printing with the “Strength” pre-set on a Bambu-lab printer is ideal.
- As with resin printing - avoid placing supports within the ball-bearing grooves.
Installation
The main components of the MB-14 can be accessed by removing screws from the base plate. The feet of the MB-14 do not need to be removed to replace this part.

MB-14 undercarriage
Once the base is removed, proceed to identify the lever to be replaced.
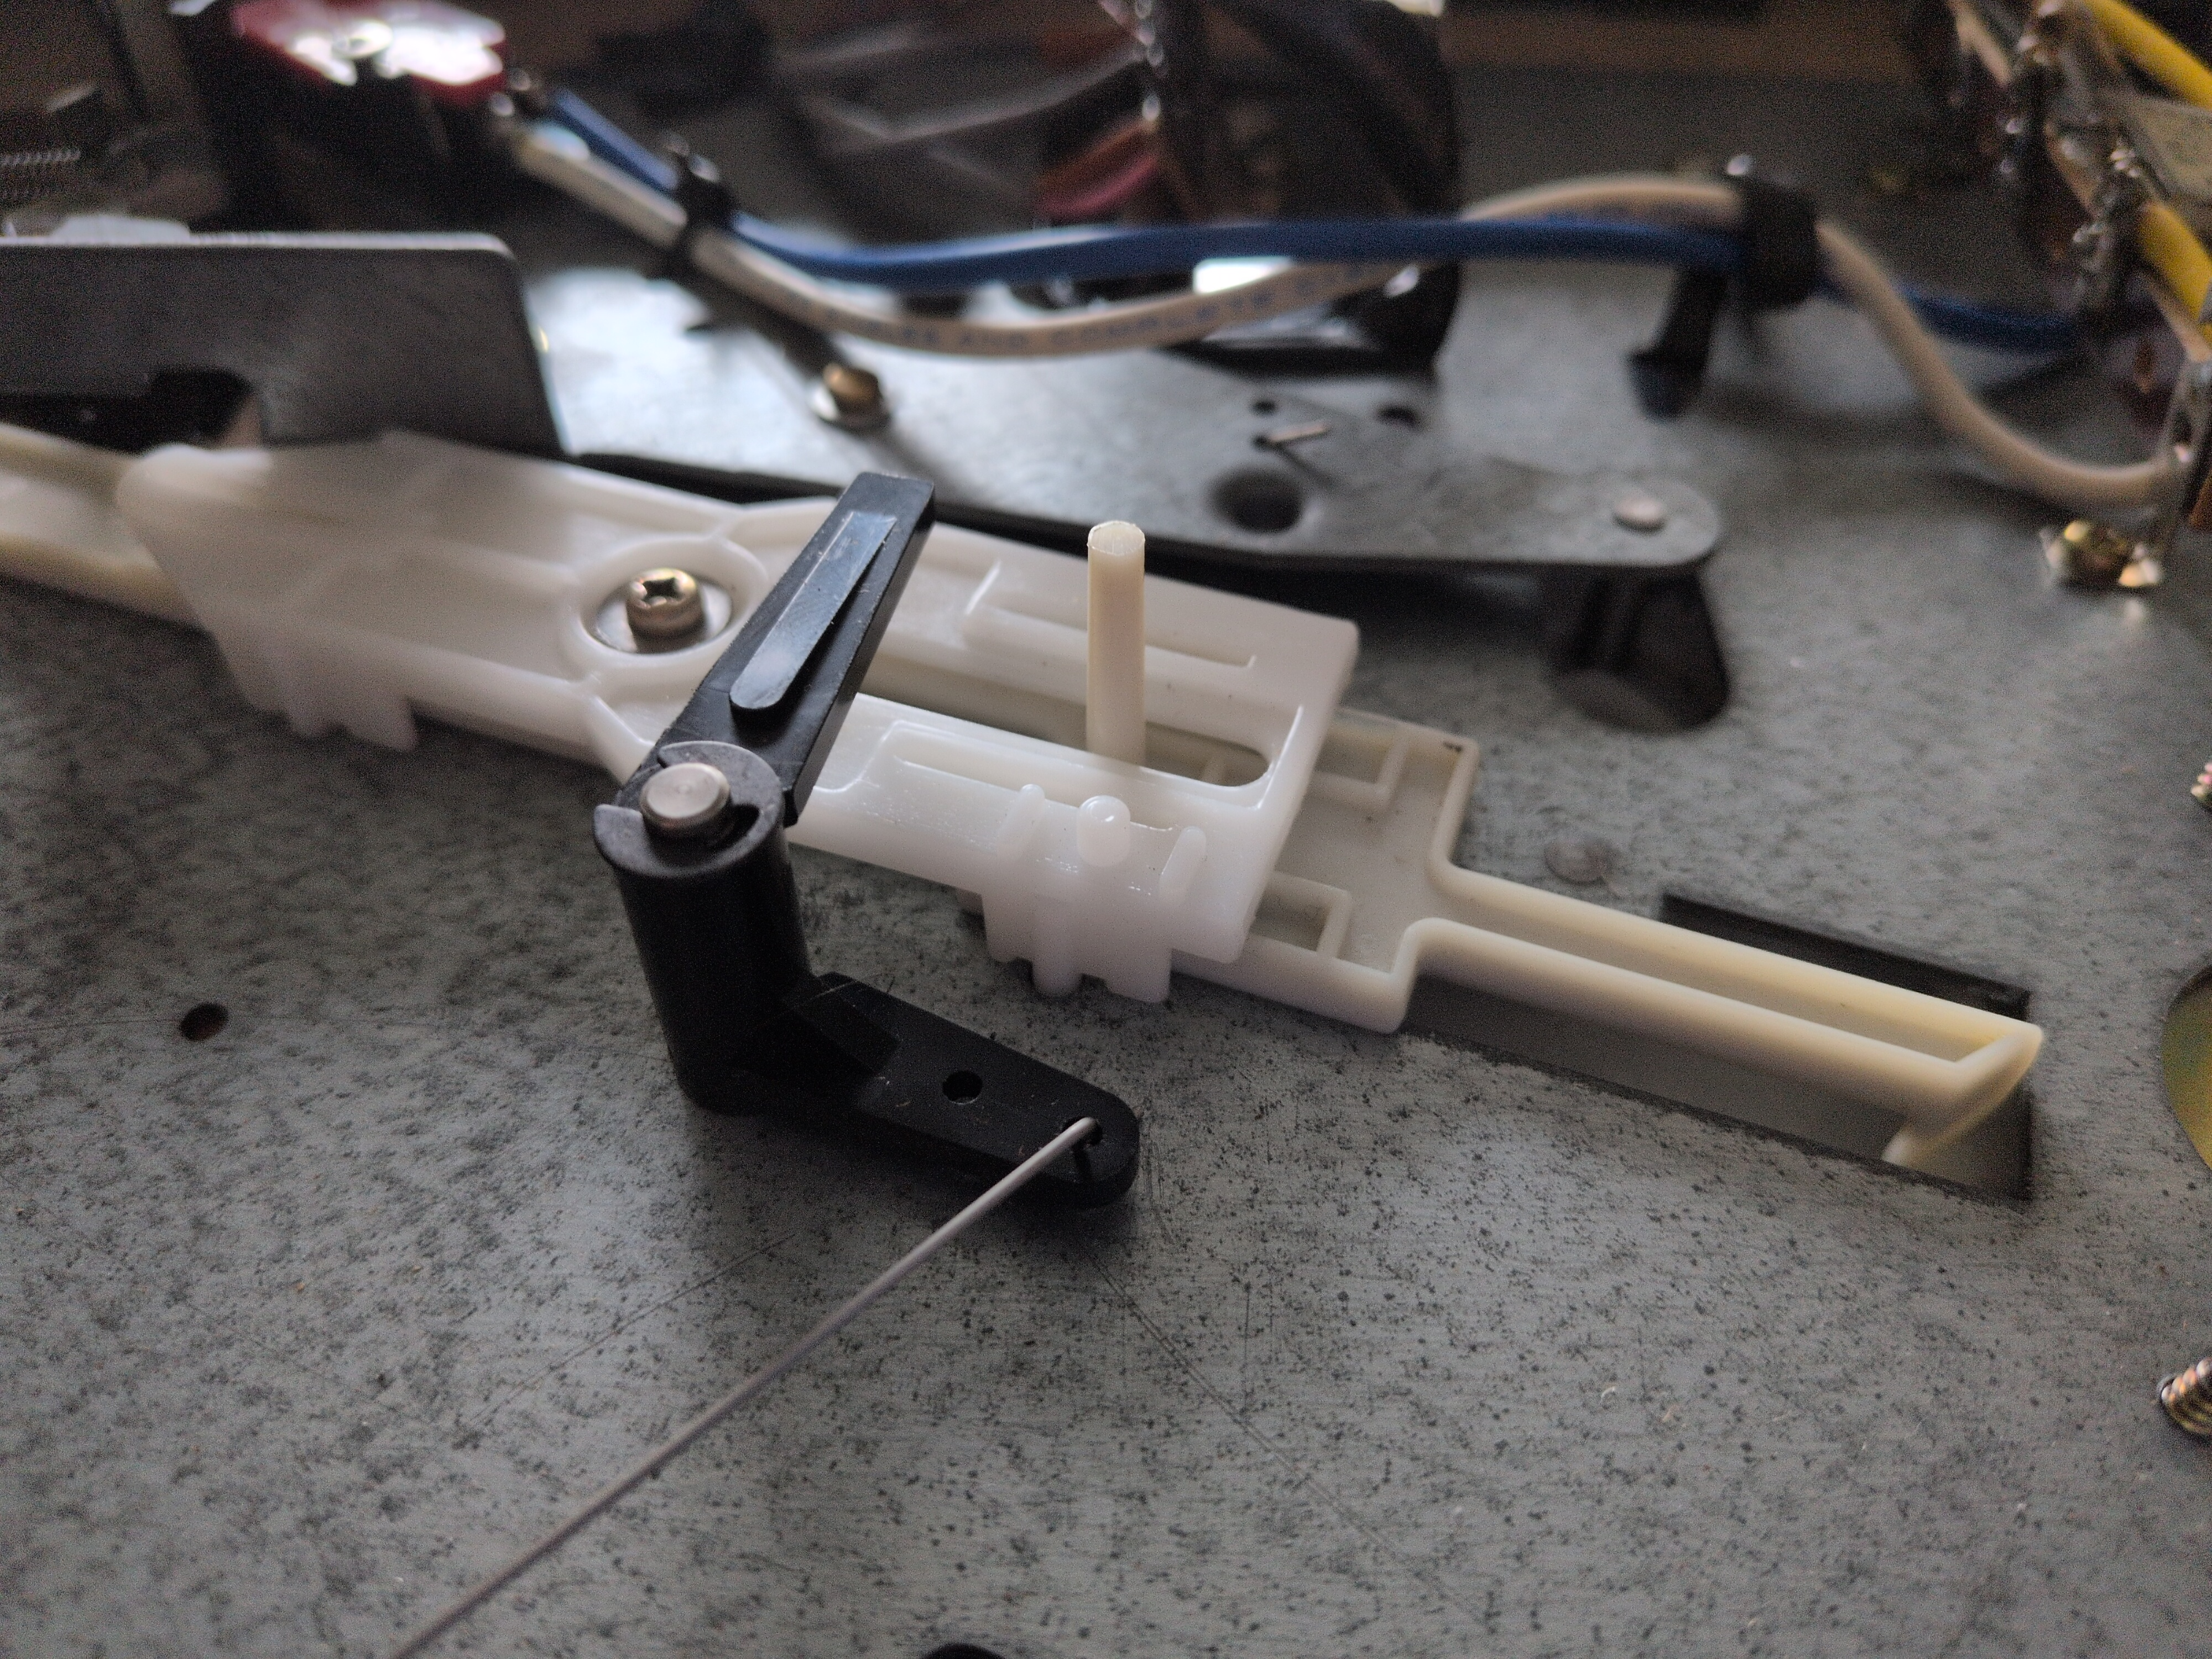
Original auto-return lever
Begin by removing the single screw in the centre of the upper lever. Carefully shimmy the upper lever out of the plinth, paying close attention to the location of the three ball bearings.
As these bearings are lubricated, they will likely stick to either the upper or lower part.
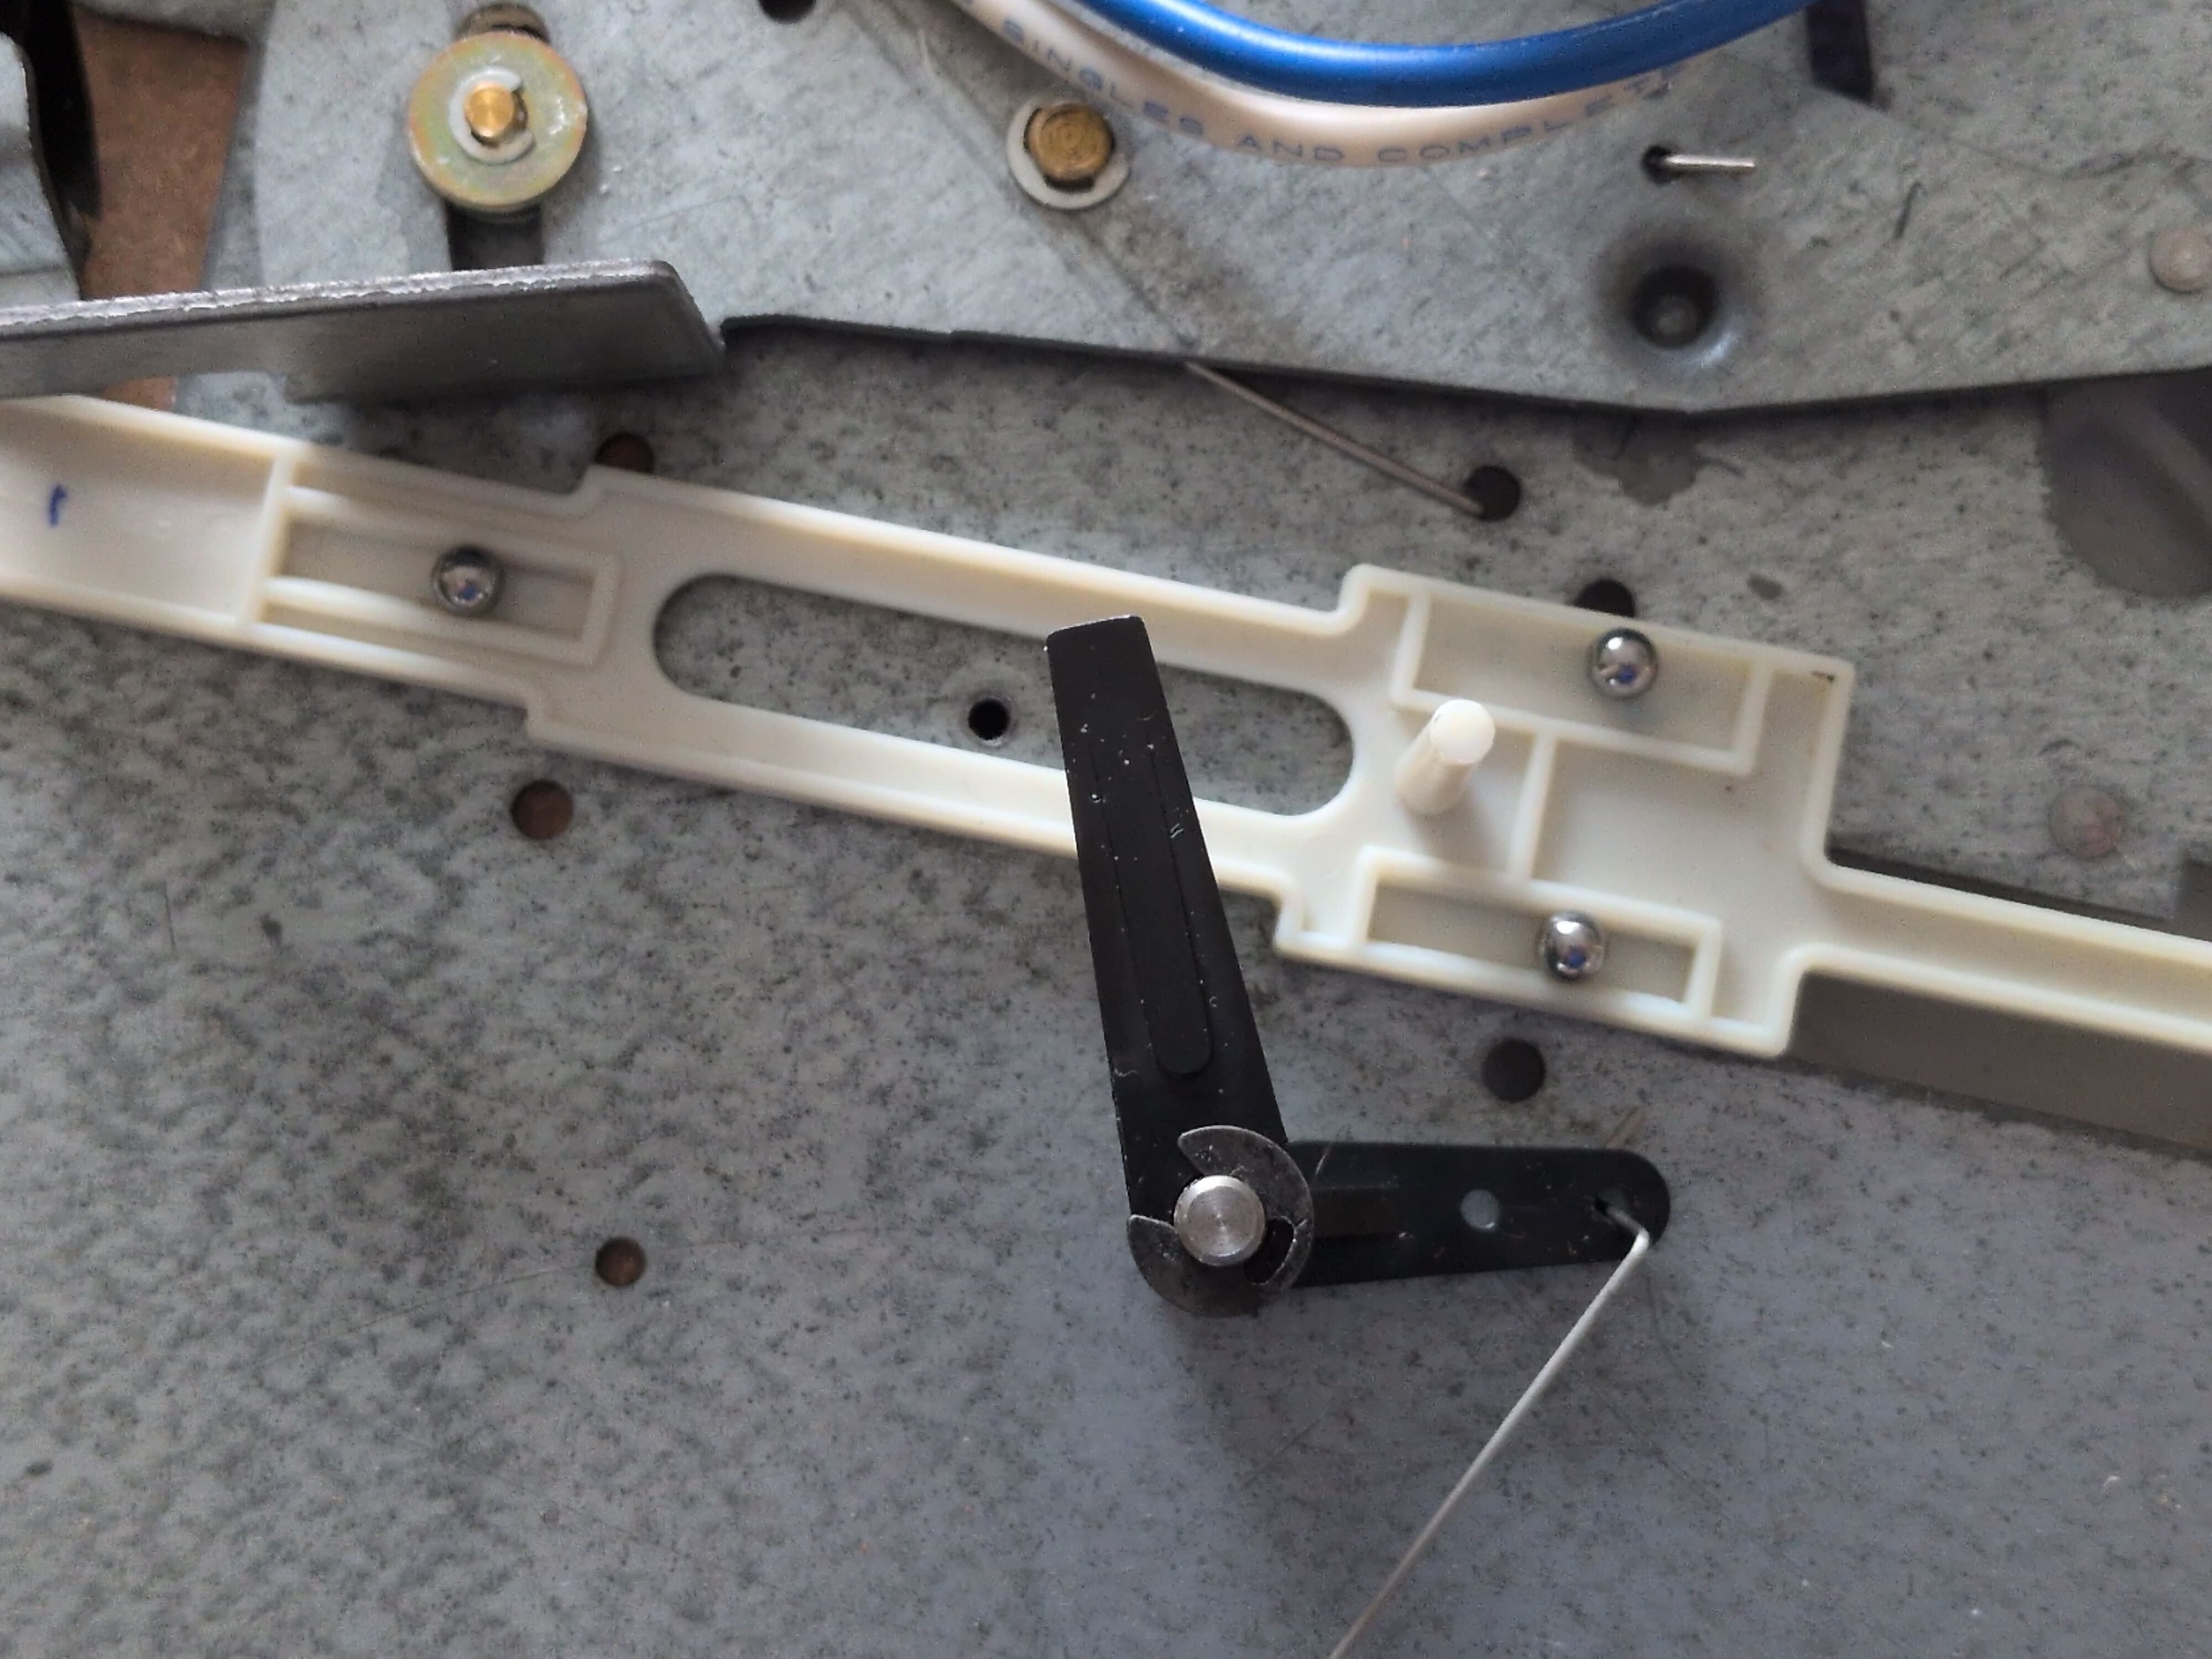
Original auto-return lever, with mounting plate removed
Extract the lever we intend to replace. The claw of the lever passes through the metal plate to reach the cam. Below is an example of a lever that is broken at point B in the technical drawing:
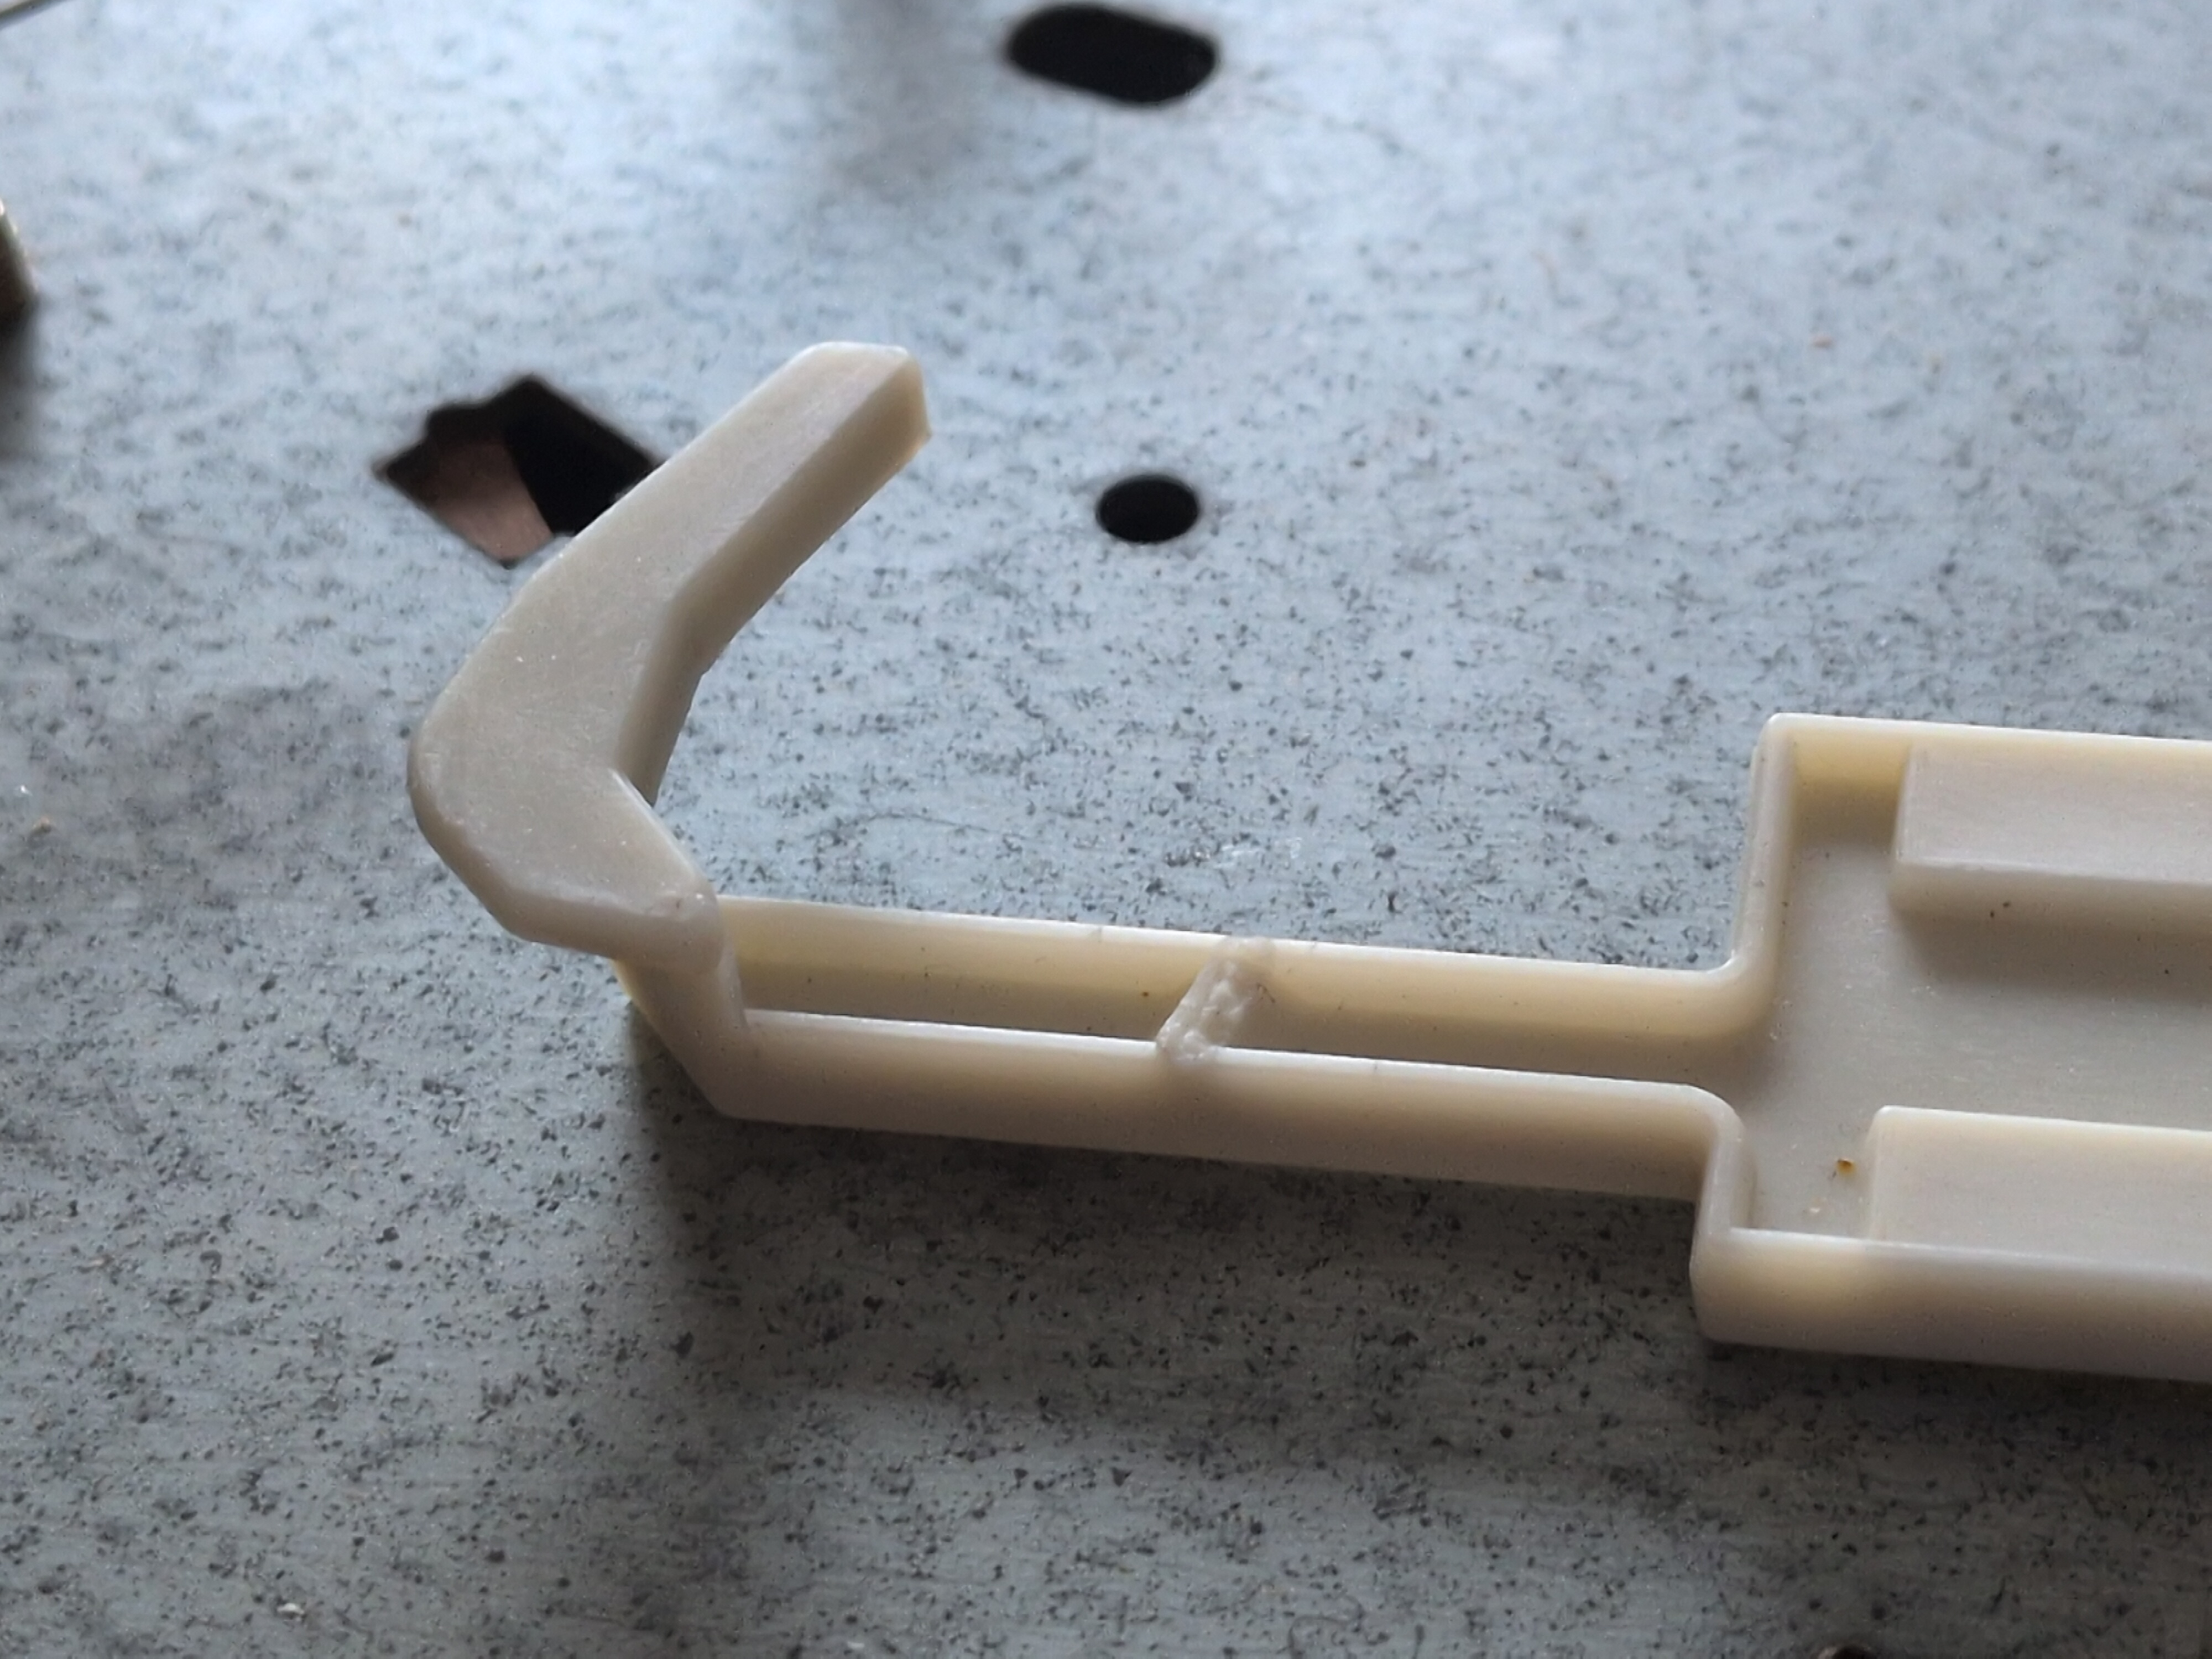
Broken auto-return lever
If upon extracting the lever, you find that both the claw and release nub are in good form - stop here.
The lever likely does not need to be replaced - and your issue is more likely to be the cam, or the V-spring underneath the metal lever that applies tension to the tone-arm lift mechanism.
Otherwise, replace the lever. It [the lever] shoud move with the slighest touch. Do not make the mistake of thinking the screw in the white mounting frame needs to press everything down. That white mounting frame exists solely to act as a loose guide for the lever.
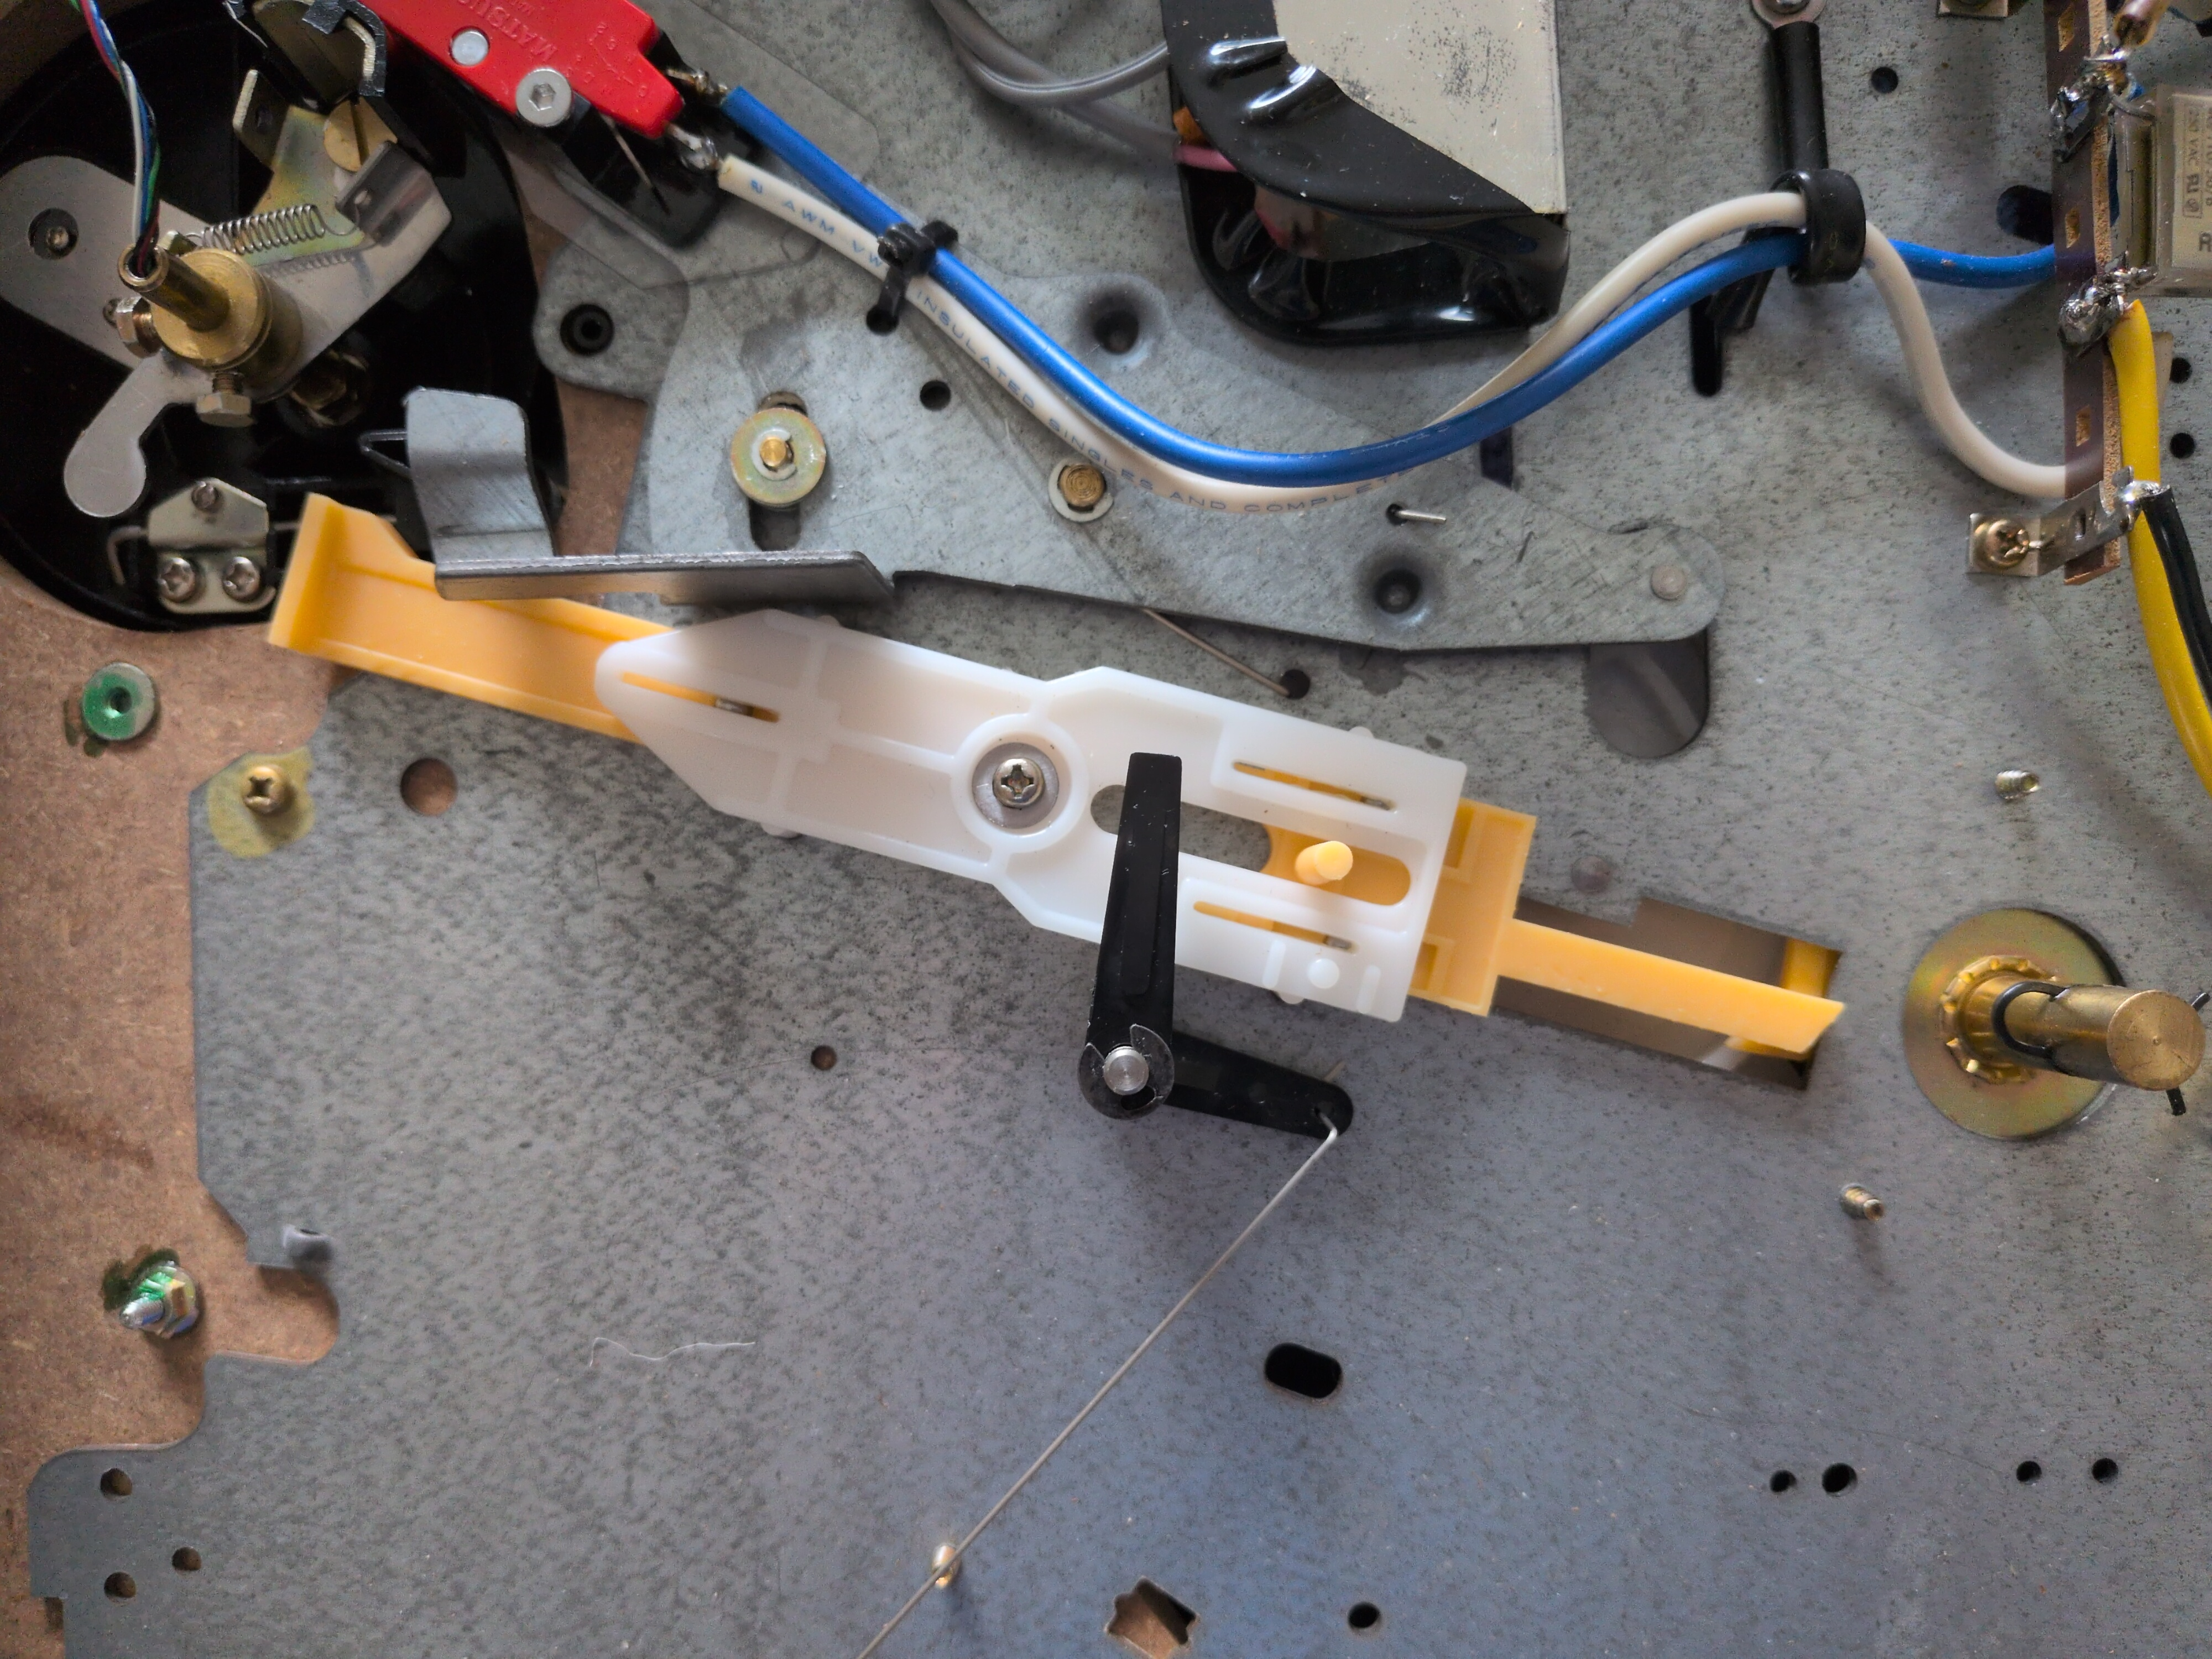
The replaced and re-mounted auto-return lever
You may wish to take the opportunity to relubricate the ball bearings with a high quality plastic-to-plastic grease. You really only need a tiny amount on each ball.
After which, you can reassemble the MB-14.
Notes (and a warning)
Please do be aware that it is highly likely to encounter skipping the first time you play through a record after replacing the lever.
This is a result of the lever being able to assume a wider range of positions than actually required for typical operation. As such, during the first playthrough post-reassembly, the tonearm will repeatedly nudge the lever forward. This nudging will cause phrases to repeat.
After first playthrough, the lever will be within a normal operational position, and this shouldn’t occur again unless the turntable is heavily distrubed (i.e. by a courier).